Mixing Acoustic Pop Production 'Void of Your Grace'
- Andy Leeder

- Jul 1, 2018
- 8 min read
Here we go! Mixing in ProTools. Something I absolutely love to do, I'll take you through a few stems and show you how I processed them using only stock and free plug-ins in ProTools 2018.
(If you haven't read my recording blog for this track you can check it out here!)
I'll focus mainly on the vocals, and the kick and snare drum!

As always, It's not so simple as to jump into your session post-recording and get straight into mixing. There will usually be a heap of editing to do, so here's a quick summary of edits that were required for this song.
1. Beat Detective: for a pop song like this having on tempo instruments is important. So straight away I put some effort into accurately using ProTools 'Beat Detective' to get the drums and bass guitar right on time! - Check out this article on Beat Detective if you're unsure what it is.
2. Phase: I checked all instruments recorded with more than one mic for phase issues, flipping phase and adjusting timing where appropriate, This is especially important for drums as here we had 10 mics on the drum kit.

3. Comping: Each instrument had two takes or more, going through and choosing the best takes to promote to the mix is an essential step in getting the best track possible. Especially for vocals for this track, I spent a few hours comping and editing the vocals here, for the doubled choruses, and each harmony.
4. MIDI quantising: Similar to beat detective, but easier in practice, I quantised my MIDI piano to the grid and made some corrections to the artists playing in note selection, velocity and sustain.
That's not everything for the edits, But lets move on to mixing! =P
Check out the track here if you wanna listen while you read!
Again, Everything in this mix has been done with ProTools stock plug-ins and free plugins! You don't need to spend hundreds on fancy stuff to have a great mix!
Vocals:
I've spent a lot of time editing these vocals, and you can read a bit about that in my recording blog for this track. All editing said and done, for the mix I really wanted an easy to hear, airy pop feel that maintained dynamics, kinda Phil Collins-y (like this), That said I really love Glings voice so I didn't want to do too much to it. Heres what I did.

Let's just check out what I did for the main chorus vox, I also have the double and single harmony that you hear in all three choruses going to the 'Vocals Chorus' bus you see above. I've done something a bit different for the verse and harmony vocals.
I started with an EQ simply for it's filters, I've placed a 6dB/oct HPF at 130Hz to get rid of unwanted lows and a 24dB/oct LPF at 16kHz, these filters help clean up the mix and leave me with the good stuff! After cleaning up the signal a bit, I placed the stock compressor on, to take around 2-3dB of level off the top of only the loudest notes.

I had a soft knee, fast attack, slow-ish release and a ratio of 1.5:1. These settings help achieve a transparent sounding compressor for vocals and with 1.7dB of added gain after the comp, I've brought up the quiet parts of the chorus and knocked the top off the harsh parts!
I've then got ProTools' 7-band EQ, and this one is the one that shapes the sound, where I've experimented and come up with something that I think highlights the best in this main chorus vocal, while removing any
harshness and unpleasant frequencies. Note that this is not the only EQ I have on this signal, I've also followed it up with some more gentle shaping EQs on the 'ChnlStrp' (Channel Strip) and another 7-band EQ you can see in the 'Vocals Chorus' bus.

Overall for the three chorus EQs, here is what I'm doing: reducing a couple of unpleasant frequencies around 330 and 560Hz, A larger cut around 1.5kHz which seemed to be the culprit for some harshness I was finding on the louder vowel sounds, this cut also helped reduce the 'overwhelmingness' of his vocals giving some space for the rest of the instruments. I'm also boosting 3-5kHz and even 7+kHz to add the airy quality that I was looking for. I found that his voice was already nice and rich in his lower frequencies, so I largely left those as they were. And I placed a stock BF-76 compressor on the vocal bus to 'glue' the verse and chorus vocals together somewhat.
If you have listened to the track and especially to the bridge, you'll have heard the reverb and delay effects I've got going on. The ProTools stock effects I often think are underrated, and I'll encourage anyone to get familiar with and experiment with them before paying for any plugins. I've used 'D-verb' and 'Mod Delay 3' for all the reverb and delay effects in this track. I used 'sends' in ProTools to add these effects to my vocals via auxiliary tracks.

I particularly love the sound I've achieved with the vocal delay you can hear in the bridge. I set it to delay by a dotted half note (three beats) and to make it more of a background addition, I've set the delay reverb to quite a 'wet' sound.
The last thing I'll add about the vocals is my automation, I've automated the volume to be a few dB louder in the chours and to reduce some really irritating consonant noises. The delay is automated to be bypassed so it's not active all the time, and couple other things that might turn this blog into a 50 minute affair =P.
Kick:
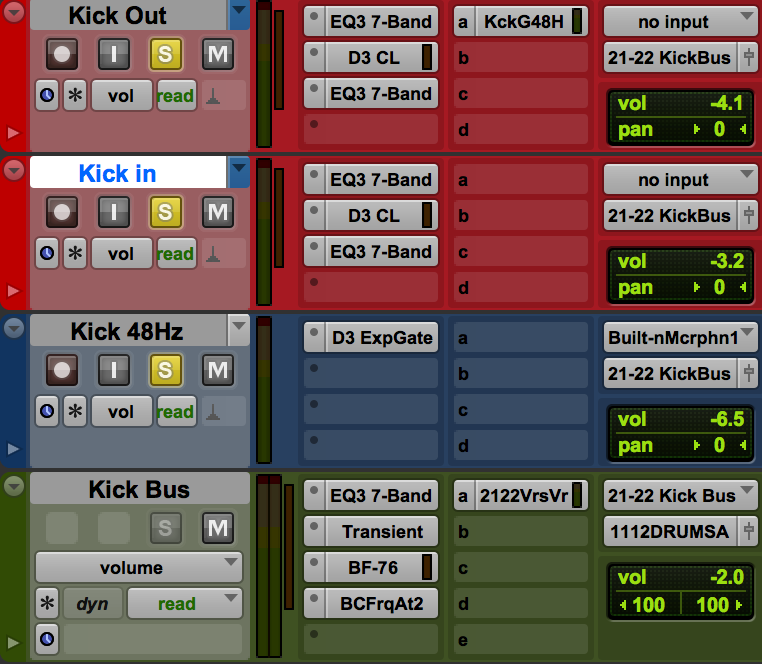
The kick was mic'ed up with an AKG D112 placed directly at the sound hole (Kick in) and a 6" speaker mic that we placed a few inches in front of the kick in the centre (Kick out). So thats two mics to mix (as long as they both sound great and fit well together, and they did!).
The speaker mic was used to pick up the low end and 'thickness' of the kick, and the AKG we used to get the attack.
Check out this article for how to make your own DIY speaker mic!

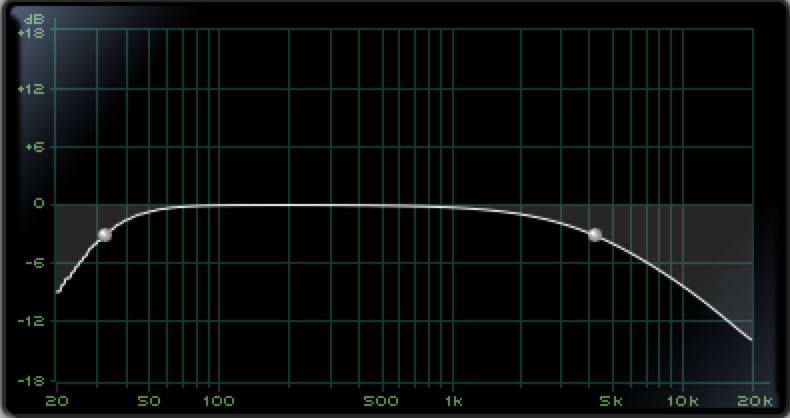
For both mics I've used a very simple processing chain, starting with a HPF and a LPF at around 30Hz, 18dB/oct and 5kHz, 6dB/oct respectively. Followed by the PT stock compressor to take around 3dB's from the top of each, while keeping the nice attack from the AKG. I've EQ'd the two separately, to sum it up though, I've basically got a nice boost at the fundamental of the kick (60-75Hz), a dip in the mids from around 150Hz to 650Hz to allow room for other instruments and a boost for the attack around 1kHz.

You can probably see that I've got another track for the kick from the image above (Kick 48Hz). This track is pretty much what the name suggests! I wanted to give my kick a bit more oomph, so I've created a new audio track and placed a 48Hz signal generator over the entire track on it. Why 48Hz? I'm glad you asked! The main key of the song is G, so I've made sure that the kicks' generator track sits in that key! The first G note sits on 48Hz. If I'd chosen an arbitrary value to add to the kick, it likely wouldn't sit as well as one thats on key. This track has a gate on it with a key input thats triggered by a send I have on one of the other kick drum mics. I used the attack and release of the gate to determine how quickly and how long the audio generator comes in with the kick.
Have a look at this youtube walkthrough if you wanna beef up your kick with a sig-gen too!

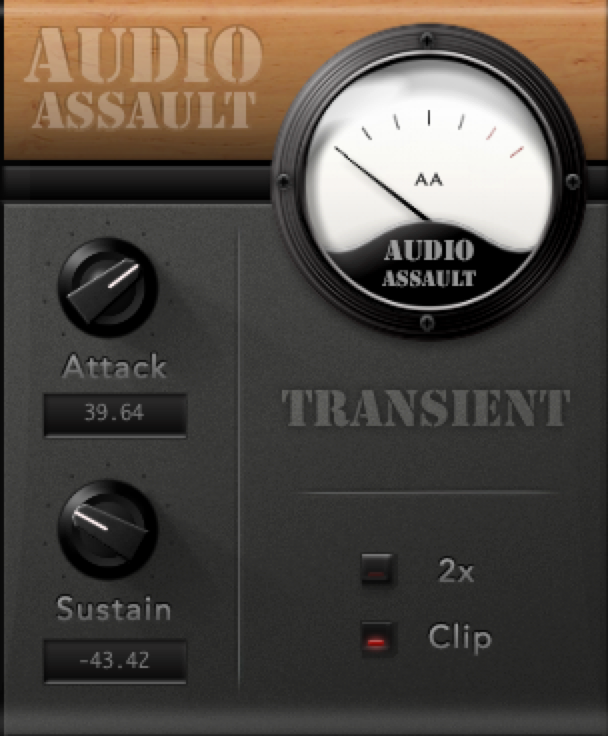
I've routed the three signals to a 'Kick Bus' auxiliary which has another filter on it and a transient designer by Audio Assault (free download) where I've brought up the attack a bit and shortened the sustain to bring it under control. And finally a BF-76 (stock plug-in) compressor with a show-ish attack and a fast release to help tie the three tracks together and bolster the kicks consistency!
Snare:
Alright now we're entering struggle city! I have really spent perhaps a bit too much time on this snare and I felt my share of frustration trying to force consistency onto an inconsistent snare. Yes I've used standard stuff like EQ transient designing on the snare, and volume automation to help the choruses pop, but I wanna talk about my struggle, as it's what I've really learnt the most from here.
Throughout the song the snare is not only hit differently from verse to chorus to bridge, but quite inconsistently from one snare hit to another. So I've ended up automating the 'clip gain line' in PT and also up layering compressors onto the snare bus, slowly whittling away a couple dB at a time until the level sits well for each segment of the song (while trying to keep the attack happy).
After putting a few compressors and getting sound semi-consistent, I found that I'd brought up the little quiet taps on the snare up too much! So I've then followed that up with an expander that I've tediously set and automated to achieve a good level for those little hits throughout the song. Have a closer listen to the snare as the song progresses and see if you can hear what I'm talking about.

At the end of the day, after a whole bunch of time and all the rabbit holes I've dived down into, I've deemed the snare to be 'acceptable' throughout the song. Which I'm not really happy with. however! I know what I can do differently next time, and you bet I've learnt a lot on how to use expanders and compressors and how to get nice and consistent levels using the clip gain line and automation. Next time I'll be able to not only do a better job and make a quicker task for the snare, but also identify when using drum replacement plug-ins will really contribute to a song.
Well thats it from me this time! Hope you've enjoyed the track and my breakdown of the mix :)
- Andy Leeder
Bibliography:
1. Pro Tools Production. (2017). Beat Detective for Pro Tools: An Overview. [online] Available at: http://www.protoolsproduction.com/beat-detective-pro-tools-overview/ [Accessed 29 Jun. 2018].
2. Behind The Speakers. (2018). 6 Easy Ways To Fix Phase Problems In Your Mixes. [online]
Available at: https://behindthespeakers.com/fix-phase-cancellation/ [Accessed 29 Jun. 2018].
3. Senior, M. (2011). Comping |. [online] Soundonsound.com. Available at: https://www.soundonsound.com/techniques/comping [Accessed 29 Jun. 2018].https://www.soundonsound.com/techniques/comping
4. Thornton, M. (2015). A-Z Of Pro Tools, Q Is For Quantise. [online] Production Expert. Available at: https://www.pro-tools-expert.com/home-page/2015/3/22/a-z-of-pro-tools-q-is-for-quantise [Accessed 29 Jun. 2018].
5. En.wikipedia.org. (2018). Audio filter. [online] Available at: https://en.wikipedia.org/wiki/Audio_filter [Accessed 29 Jun. 2018].
6. En.wikipedia.org. (2018). Dynamic range compression. [online] Available at: https://en.wikipedia.org/wiki/Dynamic_range_compression [Accessed 29 Jun. 2018].
7. En.wikipedia.org. (2018). Decibel. [online] Available at: https://en.wikipedia.org/wiki/Decibel#Audio_electronics [Accessed 29 Jun. 2018].
8. Vst4free.com. (2018). Download Free Envelope shaper plug-in: Transient by Audio Assault. [online] Available at: http://www.vst4free.com/free_vst.php?id=2153 [Accessed 1 Jul. 2018].
9. Akg.com. (2018). D112 MKII | Professional dynamic bass drum microphone. [online] Available at: https://www.akg.com/Microphones/Dynamic%20Microphones/D112MkII.html [Accessed 1 Jul. 2018].
10. Harrison, J. (2016). Easy Studio Hack: How to Make a DIY Microphone Using an Old Speaker. [online] Blog.sonicbids.com. Available at: http://blog.sonicbids.com/make-a-diy-microphone-using-an-old-speaker [Accessed 1 Jul. 2018].
11. YouTube. (2018). How To Beef Up Your Kick Drum Using A Signal Generator | Tutorial Video. [online] Available at: https://www.youtube.com/watch?v=B2fyVDwePg8 [Accessed 1 Jul. 2018].


Comments