5 Piece Recording For a Doco!
- Andy Leeder

- Nov 25, 2018
- 4 min read
Updated: Mar 5, 2020
Myself and 4 talented musicians went into the studio to record some music for a documentary on robot art! In this blog I'm going to talk about the importance of, and processes involved in preparing the recorded session and editing it before beginning mixing (pre-mixing).

Why is pre-mixing important?
Basically, pre-mixing can help you to avoid wasting time, and contribute towards a wicked mix! This is because mixing quickly can be very important, when sitting down to mix, a fresh set of ears is invaluable and helps you identify problem areas, while if you let your ears fatigue and get used to the song you can often overlook issues, your decisions will be ill-informed.
So in the interest of keeping those ears fresh and the mixing efficient, pre-mixing takes care of everything involved with the layout and organisation of your DAW session or console.
Much like a chef puts all of the ingredients in those tiny little glass or metal bowls, all measured out and chopped into their preferred size, we must do the same. - Kenny Gioia
Where to start?

Name your tracks - short, to the point, easy to understand names will certainly help you recognise your tracks as quick as possible. It's probably no longer important that the snare was recorded with a SM57, keep it as simple as possible 'SN TOP' for example.
Organise your tracks -
Order your tracks in similar groups, 'percussion', 'guitars', 'vocals' etc.. Colour code them, and from top to bottom, order them the way you like to mix, perhaps the most prominent tracks at the top going down to the smaller details at the bottom. I then group those bad boys together!
Create your effects returns -
Or import a template if you have a preset you've made! This means any reverbs, delays or other effects will be accessible in the mix without having to stop and do session management or create new tracks etc in the middle of your creative headspace! For me this includes having named auxiliaries and even a default reverb plug-in ready to tweak. For this simple live recording I had a small reverb, large reverb and a single delay ready to go. For larger projects I'd load up a larger session template that includes a lot more!
Busses -
For me, almost everything ends up with its own bus, this time I bussed the drums, bongo, handpan and guitars separately. This enables the mixer to apply processing and effects to the entire instrument while still enabling more focussed processing on the individual tracks.

Editing!
After my session organisation, I set to the cleanup!
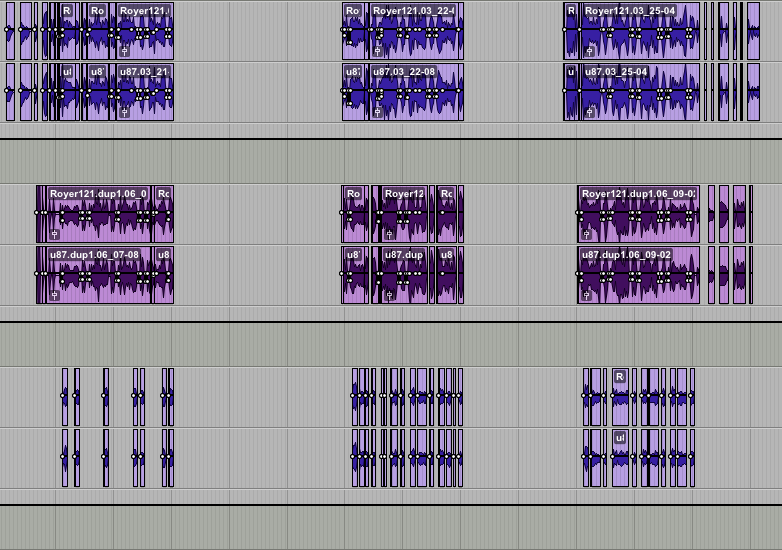
This involved listening to our almost two hours of recording, and picking the best takes of the tracks that we attempted a few times, as well as identifying the little bits here and there that could act as great transitions for the documentary. A rough levelling of the session helped me listen with ease and I added markers so the mixer could easily glance at the session and understand what was going on.
I did a general cleanup of the session regarding deleting sections of audio that weren't applicable to a song (e.g bongos were not in our 3rd track).
I added fades to each track, to create an easy to hear start and ending to each song and clip.
Finally I did some clip gain automation, in order to reduce large transients and I also put the bass track through some de-clipping (iZoTope De-Clip) as I noticed it was peaking on a few occasions.
Now the session is easy to see and understand, and ready to mix! I gave the session to engineer Joao Paulo (JP), who jumped straight in and was able to get the mix done efficiently as a result of my editing.
I might listen to it three or four times before I even think about mixing. I want to know the song. I want to hear the things that I can improve upon; things I might want to take in different directions, make more or less exciting, whatever it might be. - Warren Huart
This quote from producer and engineer Warren Huart for me highlights the importance of a good edit before mixing is even thought about. The edit will provide this experience of being able to listen to a track cleanly and think of where it could be taken!
If you'd like to listen to the resulting tracks you'll be able to find them here! (files to be uploaded soon)
This type of workflow, benefits everyone i.e. having a separate editor and mixer for recorded tracks. For JP and myself, this really sped up the mixing process, reduced the workload for both of us and I'd argue that the mix is better because of it, as JP was able to start the mix straight away with fresh ears, allowing more mixing to be done in an accurate headspace!
Our teamwork throughout this entire process from planning, to recording, to editing, to mixing and mastering has, I believe been excellent. We all knew where we were at every step of the way and were able to get the final deliverables to the documentary editor almost a week before the agreed due date.
References:
1. Gioia, K. (2017). Pre-Mixing. [online] Groove3 Blog. Available at: https://blog.groove3.com/articles/pre-mixing?fbclid=IwAR10s24O3hdTFRULFWt7ptPMRxPxfffK96eLTXW81DkYvu21WT_wLL6aG-E [Accessed 13 Nov. 2018].
2. Huart, W. (2018). Mentally Preparing Yourself Before Starting a Mix | FAQ Friday. [online] Produce Like A Pro. Available at: https://producelikeapro.com/blog/mentally-preparing-yourself-before-starting-a-mix/ [Accessed 13 Nov. 2018].


Comments